Restoration of a 1918 Harley Davidson Bicycle – Part 6: Pinstripes and Decal
Haven’t read part one yet? Check it out first!
 One of the most rewarding parts of a restoration, is the detail work that really brings the bike alive. The Harley Davidson bicycle has a lot of pinstripes that add interesting detail to an otherwise plain paint-job. Pinstriping is a skill that is difficult to master, at least if you plan to make it look just like the factory did. In my case, I haven’t come even close to mastering this skill… so I cheat. I tape off almost every pinstripe on the bike, then lay down some 1-Shot pintriping enamel between the tape. Short lines I can do by hand, but the longer ones? No way. Since most of the pinstripes on the bike intersect with others, I mask off the longest lines first. After I’ve finished painting between the tape, I’ll start peeling it all of very carefully… all the while, the stripes are still wet! Why don’t I wait until it’s dry? Because I want the edge of the paint where it was up against the tape to naturally flow back as though it was done by hand with a fine brush. I don’t want an edge that looks like it was taped. If I make a mistake by smudging a stripe or getting a fingerprint somewhere, I come back and clean it up before it dries fully. When the pinstriping enamel is nearly dry, it’s still pretty easy to wipe off with a rag and some mineral spirits. I come back and re-tape and paint any areas that I smudged off. In the case of this project, I got lucky and only had to re-do two spots.
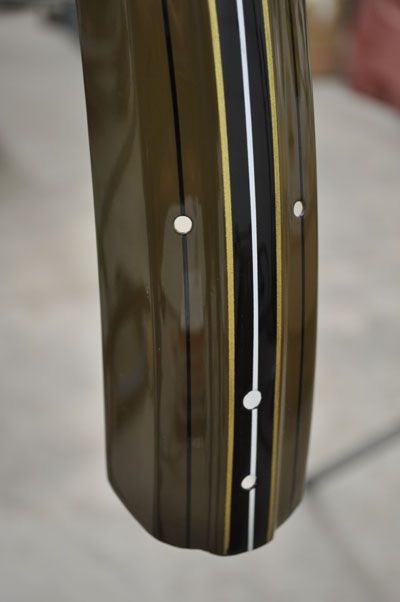
The Harley gets three different pinstripe colors. Black, gold and white. The final job looks stunning!
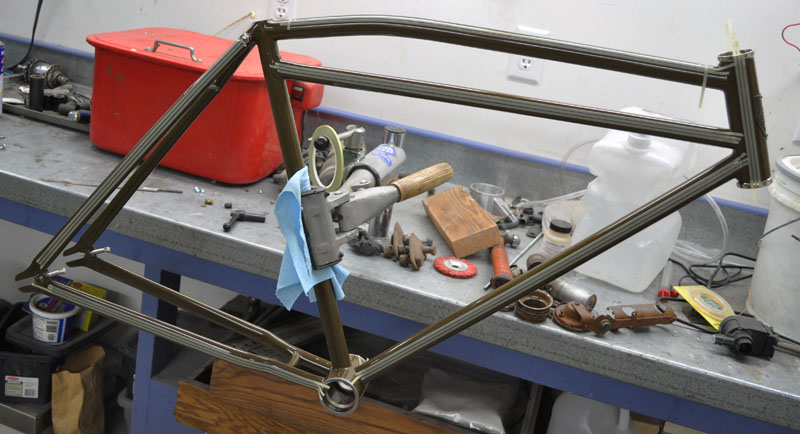
The frame, taped off for pinstripes
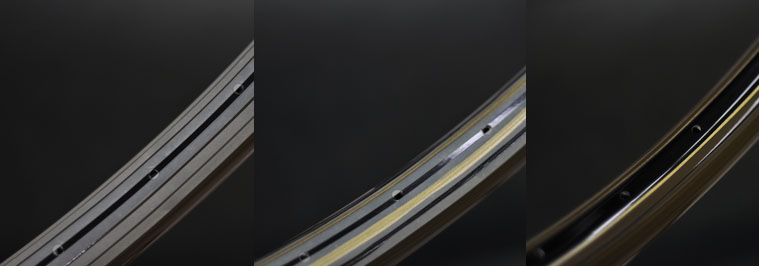
The rims… taped, painted, and the final result.
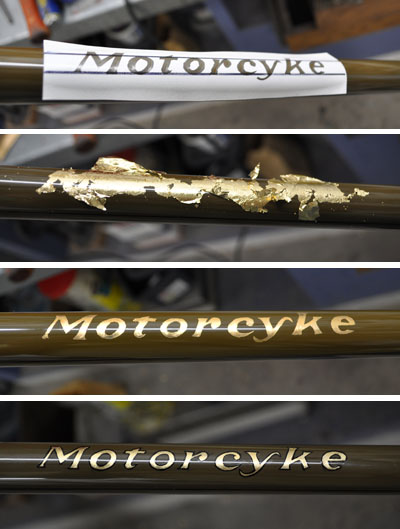 The down-tube of the Harley Motorcyke get a neat decal that appropriately names the bike “Motorcyke”. Since no reproduction decal is available, I had to make a stencil and do it by hand. Researching the web, I found a few photos of original un-restored bikes that offered clear enough shots of the decal for me to make a pretty accurate educated guess as to how the decal should look and be sized. No surprise, the font used in the decal is the same one used for the “Harley Davidson” lettering on the head-badge. I made the stencil using some masking vinyl that sign shops use. Normally I would have used my vinyl cutting machine and sign software on my PC to cut the stencil, but the machine was on the fritz, so I just cut it by hand with an Exacto knife like they used to do in the old-days. If you think I’m going to put down some gold paint through this stencil, you’d be wrong. The original decal had a very metallic gold color to it… I suspect they used real metal of some sort in their original inks, because it had a radiant quality to it. So, even though it isn’t 100% factory authentic, I opted to put down gold-leaf. It looks far better than gold paint, and it really isn’t that hard to do. The first step in the gold-leaf process is to paint on the adhesive. It looks and smells very much like watered down Elmers glue… maybe that’s really what it is? Anyway, I brushed it on then removed the stencil. After the glue was tacky, I put down the sheets of gold leaf and pulled away all the biggest loose bits. At this point I let it dry before brushing away the rest of the excess. It leaves a slightly rough edge, but no worries, it’s supposed to have a black outline. I did this by hand with a fine brush and the same black enamel that I used to do the pinstripes. After the pinstripes were thoroughly dry, I brushed some clear over the gold leaf to seal it in. It would be a LOT easier to have a pre-made decal for this, but ya gotta improvise when doing rare bikes like these.