Restoration of a 1918 Harley Davidson Bicycle – Part 8: Restoring the Pedals
 Haven’t read part one yet? Check it out first!
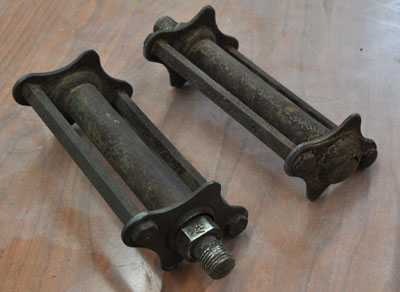
With many vintage bicycle restoration projects, the pedals aren’t too big of an issue. With earlier bikes however, they can be a challenge. This Harley Davidson is no exception. The pedals, while not terribly hard to find, are often in very poor condition. To complicate matters, there are many variations of the correct pedals that look nearly identical until you take them apart and try to swap parts to build one good pair. I had a box of about a dozen pedals, but was barely able to assemble one good pair from all of them! The end caps posed the biggest challenge, since they are typically dented and have holes worn through them. I had to weld up the holes and grind them smooth, inside and out on one of them.
Media blasting to remove the rust allowed me to see just what repairs were needed, or what parts weren’t going to be good enough. I did some finish work myself on them, before taking them to the plating shop to be nickel plated. They actually came back looking pretty darn nice, especially considering how they looked before.
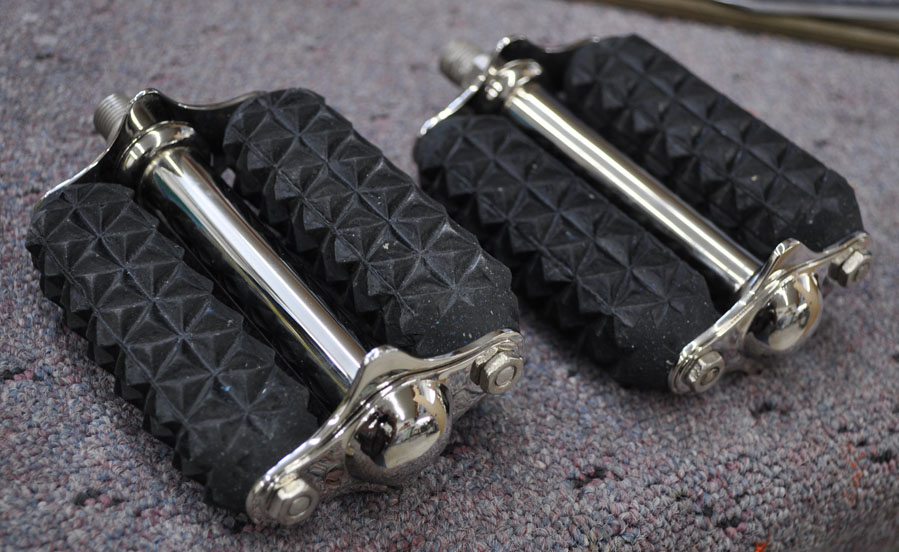
 The next challenge was the rubber blocks. Although these diamond pattern blocks look much like what you’d see on bicycles from the 60’s and 70’s, they are actually quite different. The blocks are much fatter, giving the pedals a beefy appearance. Reproduction diamond blocks are readily available in the smaller 1960’s size, and even the beefy ones are available for the antique motorcycle market, but sadly the motorcycle variety are a little too wide. Not only that, they are very expensive. As luck would have it, a seller on eBay had listed some modern generic bicycle pedals that have blocks that looks about the right size! They didn’t have the same tapered ends like the originals, but the fatness was correct, and the width very close. Since these pedals were cheap, I ordered a pair. Upon their arrival, I was pretty happy with how they looked, but the lack of tapered ends wasn’t going to work. I figured I’d try grinding a taper into them to see how they look. I didn’t really have much to lose, so I gave it a shot and I’m happy to say that they look pretty good and really make the finished pedals look authentic!
Next in part 9, we finish the bike!