Restoration of a 1918 Harley Davidson Bicycle – Part 9: Finishing the Bike
Haven’t read part one yet? Check it out first!
The final assembly of a restoration is always fun. It’s the time that you get to see all your hard work pay off. It’s the time that you get to see those restored parts that have been on the shelf for weeks or months finally find their home on the bike. If you’ve done all your homework and pre-fitted things ahead of time, everything should go smoothly. There will almost always be some adjustments that are necessary or a fastener or two that had been forgotten, but generally, things should go together fairly quickly.
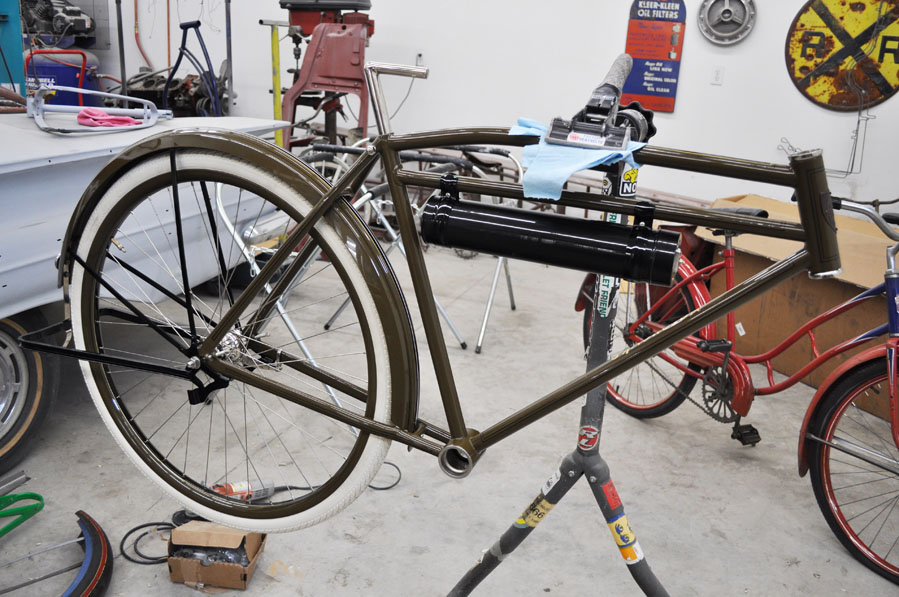
During the assembly of the Harley, the only unexpected last minute challenge was with the fender braces. I had restored a set of braces that have one center mounting hole, while the fenders were of the two-hole (side by side) variety. Oops! No problem, I just drilled new holes in the braces and continued with assembly. I did end up being short by a few screws, but I fired up the Caswell nickel plating tank and plated up some screws from the hardware store and was back in business.
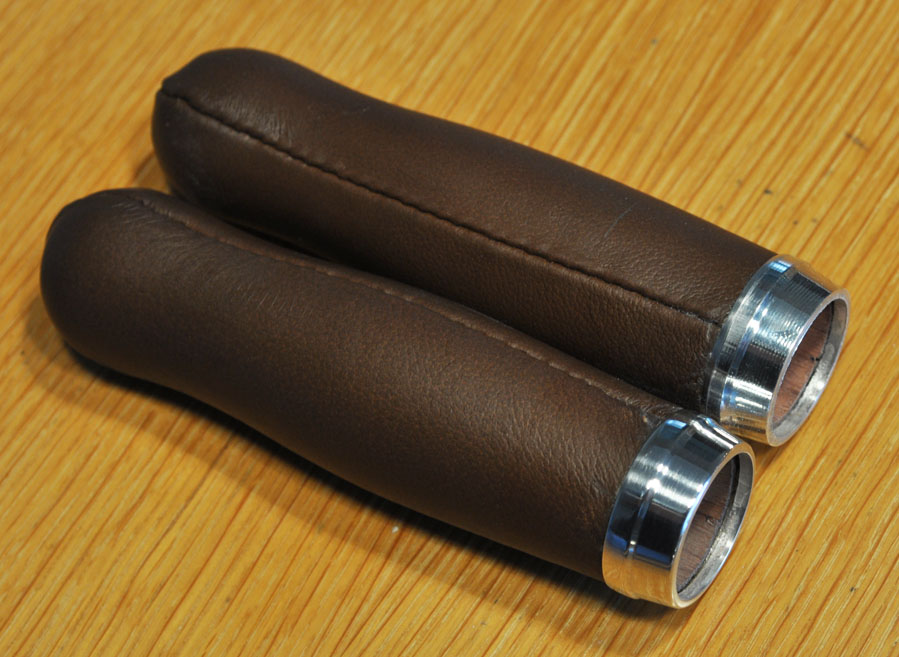
The grips that the Harley was originally equipped with were made of a hardwood core with a stitched leather wrap and an aluminum ferrule (Harley called them Bulldog grips). These original grips are difficult to find, and almost never in good enough condition to use on a restored bike. As luck would have it, someone in the antique boat-motor hobby had started making reproductions of these grips. Apparently they were used on the tiller of antique boat motors. I ordered a set and was pretty happy with them, with the exception of the aluminum ferrule, which looked a bit crude. Knocking the rough edges down with some fine sandpaper, then re-polishing got them looking decent. Many Harley bicycle restorations are finished with standard rubber coke-bottle grips since those are readily available, but now that these reproduction leather Bulldog grips are on the market, it’s a no-brainer to use them.
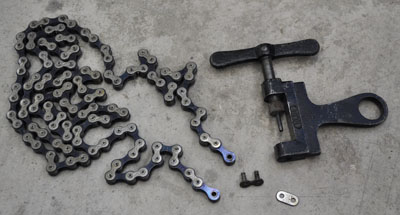 The chain can be a challenge on most vintage/antique bicycle restorations. With the Harley, it used a 1″ pitch chain that is no longer available. Chain’s are not hard to find, but unless you find one that is NOS (New Old Stock, never used), you’ve got some work ahead of you to make it look decent, and even after that it will never look new again. The Harley is worthy of a rare NOS Diamond brand chain, so that’s what it got. After taking a couple links out to make it the right length using my trusty vintage ELDI chain breaker, the bike now had a very nice looking chain with alternating blue anodized and nickel plated links.
Restoring the Harley was a challenge, but one that was well worth the effort. It was a bike that was for the majority of its existence over the last near 100 years, a rusted pile of junk that could have at any moment found it’s way to a recycling center, or buried in a landfill. But, that wasn’t it’s destiny. Instead, it has been restored back to like-new condition and will be admired for many years to come.